DWUser.com
Empowering Web Creativity
Support Center - EasyMapBuilder
On-Demand Support Options
Resources to get started with and use the EasyMapBuilder program:
Quickstart Installation Instructions
When you download the EasyMapBuilder_buildVVV.zip file (where vvv is the build number) from your account, unzip the contents to an easy-to-find location. The first step is to install the wizard program. This step is slightly different for Mac and Windows:
- Windows - To run the installer, double-click the EasyMapBuilder-Windows.exe application in the download package. Be patient; it may take a moment to launch. It will install any necessary prerequisites along with the wizard program. Leave the default settings for any installation options unless you're an advanced user and you fully understand them.
- Mac - Double-click the EasyMapBuilder-Mac.dmg disk image file in the download package to open it. You will see one item inside: an installer labeled Install EasyMapBuilder. Double-click this file to run the installer. (If you receive a warning about the application developer being unidentified, see these directions.) Be patient; the installer may take a moment to launch. It will install any necessary prerequisites along with the wizard program. Leave the default settings for any installation options unless you're an advanced user and you fully understand them.
Optional Dreamweaver Extension Installation:
If you have Dreamweaver, you can use the included Dreamweaver extension for easier access to EasyMapBuilder for creating and managing maps. Once you've installed the EasyMapBuilder application as described above, you're ready to install the extension. To do this, first launch the Extension Manager by selecting Help > Manage Extensions in Dreamweaver. (If you have a version of Dreamweaver that doesn't have this option, launch the Adobe Extension Manager directly from your Applications/Programs menu. Then, in the Extension Manager, make sure that the Dreamweaver version matches the version of Dreamweaver you use.) Click the Install button, then select the EasyMapBuilder_DW_ext.mxp file from the download package. (If you're using Dreamweaver CC, select the EasyMapBuilder_DW_ext.zxp file instead.) After selecting the file, click OK and allow the installation to complete. Restart Dreamweaver, and the extension will be ready to use.
Quickstart Usage Instructions
The preparation for creating a map differs slightly, depending on whether you're using the Dreamweaver Extension or not:
- Preparation for Dreamweaver Extension - You must have an existing HTML page that will hold the new map. (You can create a new page if needed.) Additionally, you must have already created a Dreamweaver Site Definition and saved your page within the site's root folder. (The site's root folder is the folder that holds the homepage.)
- Preparation for Standalone version - You must have an existing HTML page that will hold the new map. (You can create a new page if needed.) Additionally, you must have a single folder that holds all of the files for your site, including the HTML page. This folder is referred to as the Site Root Folder; it is the folder that holds your homepage. If you're not sure what this folder should be, just assume that it's the folder holding the HTML page.
There are two ways to access the EasyMapBuilder wizard to create a map, depending on whether you're using the Dreamweaver Extension or not:
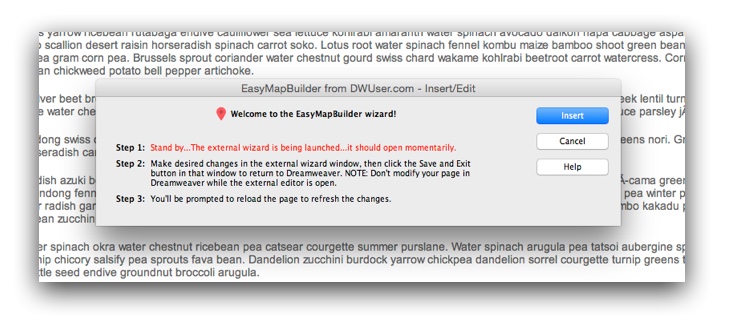
- Accessing the Dreamweaver Extension - Place the cursor at the location where you'd like the map to be added. Select Insert > DWUser > EasyMapBuilder to launch the wizard. The Dreamweaver communication dialog will appear momentarily:

The EasyMapBuilder wizard will automatically be launched and appear after a moment. - Accessing the Standalone version - You will launch the EasyMapBuilder program directly from your Programs or Applications menu. When you first launch, you'll have to specify the HTML page and site root folder with which you're working. These should be the values you determined when preparing to insert, as discussed above.
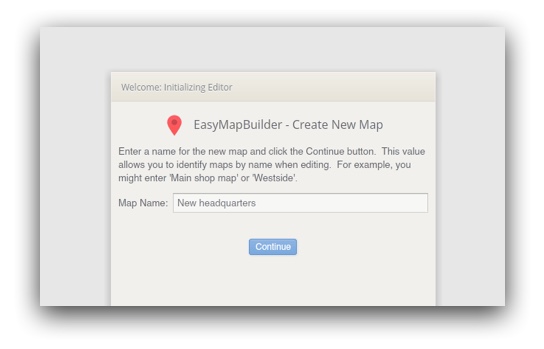
The map name simply allows you to identify it more easily later. You might enter 'Headquarters' or 'New sales territory' or similar. After entering a name, click Continue again.
You'll now be in the main edit view:
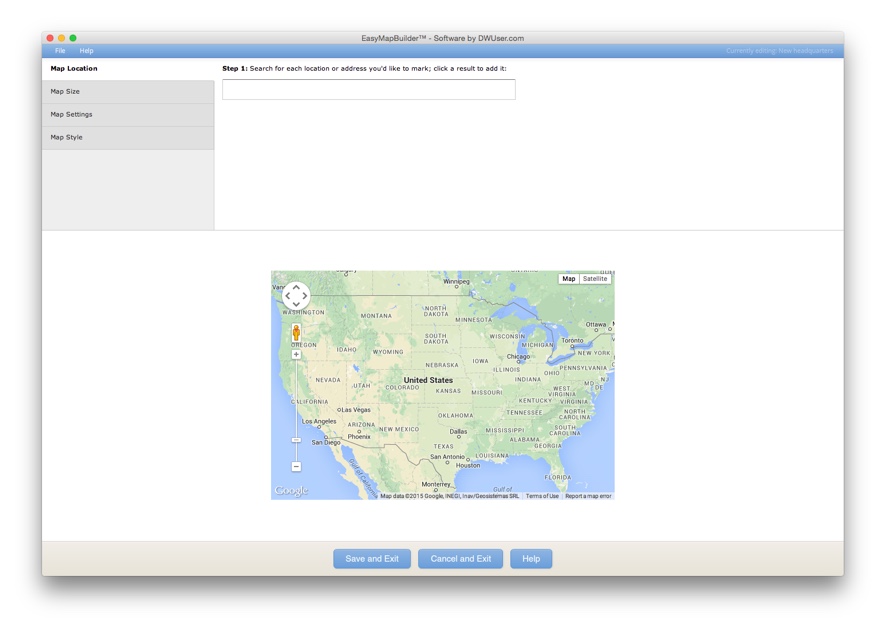
If this is your first launch, a brief welcome tour will be displayed to help familiarize you with all of the available options. Note that this welcome tour is available at any time via the Help > Show Welcome Tour menu option within the editor.
In the bottom portion, you'll see a true-to-life preview of the map you're working on. In the top portion, you'll see the control options. The first section is the Map Location panel, where you can control the map's position and add any desired markers. To start, search for a location or address by typing in the search box:
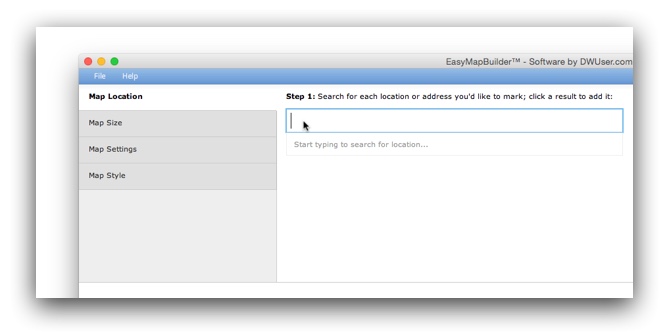
Tip: You can also enter latitude/longitude coordinates in the format lat,lng (e.g. 15.01234, -10.78901)
When search results appear below the box, you can click on a result to focus the map on the location and add a new marker:
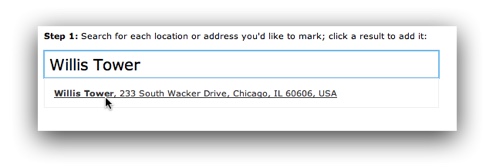
Once you click on the result, the map is re-focused and a new marker is created:
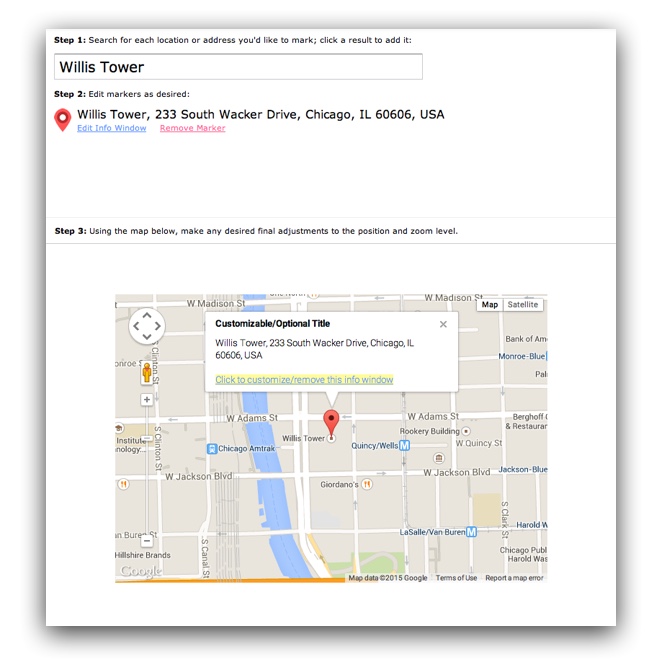
You can click on the popup info box to customize or remove it. As with a normal Google map, you can drag the map to tweak the position or use the zoom control to adjust the zoom level.
Type another location in the box to add another marker; you can use the Remove Marker link to remove a marker altogether.
Customizing Map Size
The main Map Size section is where the size of the map may be customized:
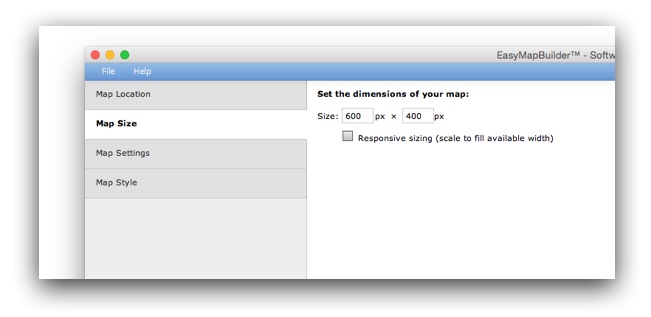
You can set the map size in pixels. Checking the "Responsive Sizing" checkbox will cause the map to scale up (or down) as needed to fill the available page width.
Note: If the preview dimensions are larger than the available space the map may be cut off in the preview area, but scrollbars will appear so you can scroll to the hidden part.
Customizing Map Settings
In the Map Settings section, you can customize the behavior and appearance of the map:
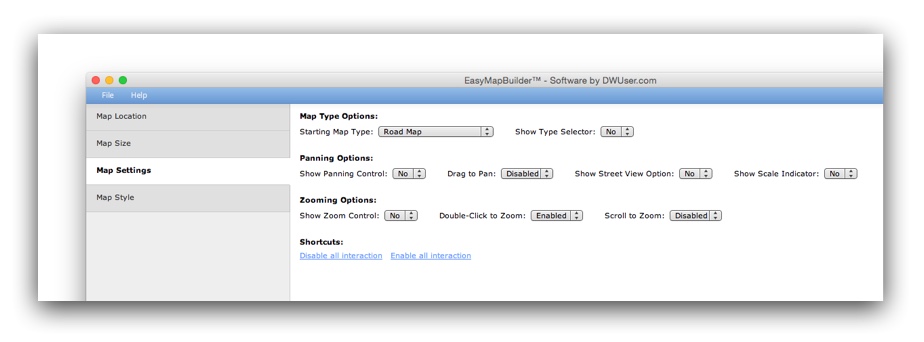
As you customize each option in this section, the corresponding option will update instantly in the preview below. Here are details for what each option controls:
- Map Type Options:
- Starting Map Type: What should the map type be? Road map, Satellite, Hybrid (Roads + Satellite), or Terrain.
- Show Type Selector: Enable/disable the map type selector in the top-right corner of the final map.
- Panning Options:
- Show Panning Control: Show the button control that allows moving the map's position?
- Drag to Pan: Enable dragging the map to reposition it?
- Show Street View Option: Include the Street View button, so viewers can switch into Street View mode?
- Show Scale Indicator: Show a scale indicator at the bottom of the map when it fits?
- Zooming Options:
- Show Zoom Control: Enable/disable the +/- buttons that allow for zooming in and out of the map.
- Double-click to Zoom: Enable/disable having the map re-center and zoom in whenever it is double-clicked.
- Scroll to Zoom: Enable/disable using the mousewheel to zoom in and out of the map.
The shortcut links at the bottom allow for quickly enabling or disabling all interaction on a map.
Customizing Map Style
The Map Styles section allows for customizing the visual style of your map:
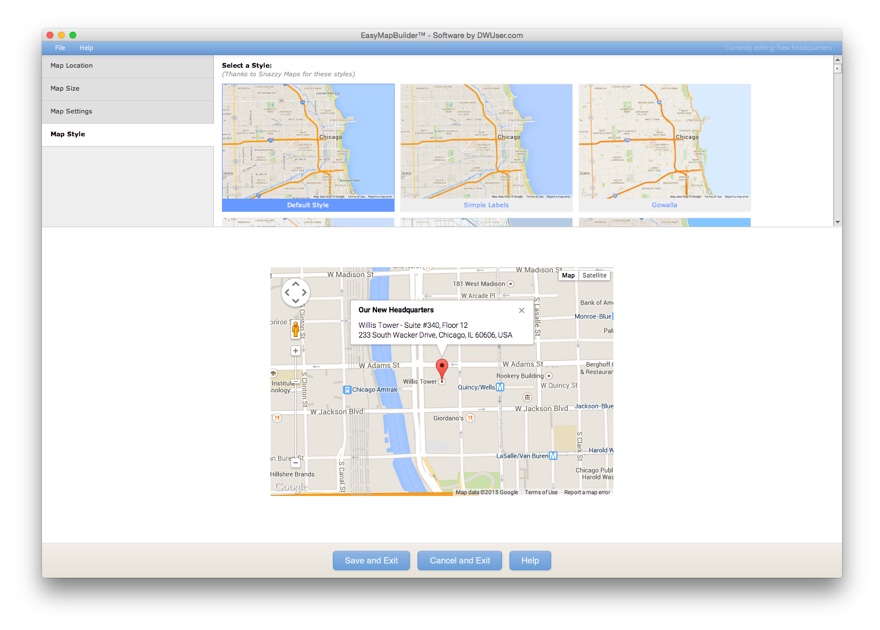
Clicking on a style tile allows you to quickly apply it and instantly see the preview below. Here's an example of one of the 50+ included styles:
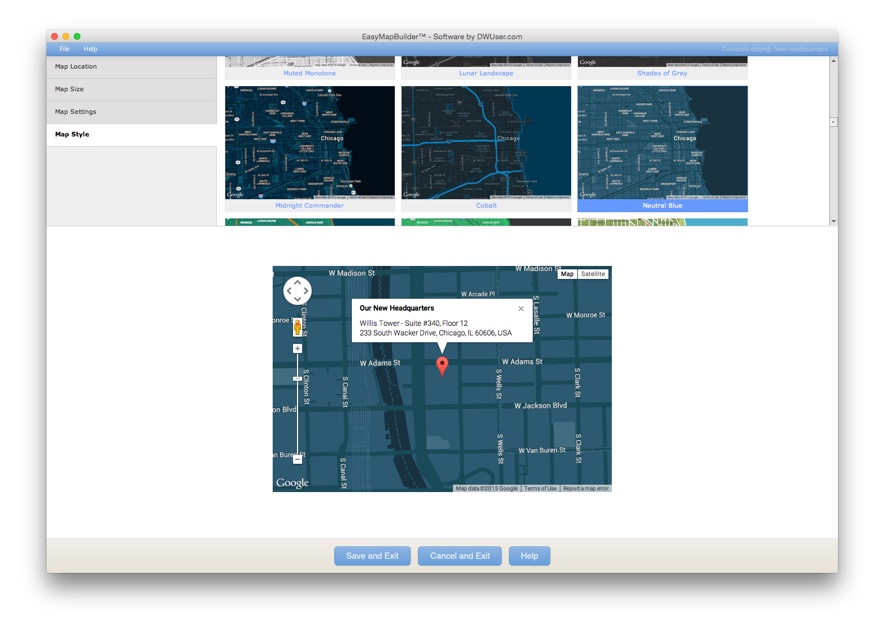
(This is the Neutral Blue style.)
Inserting and Editing Your Map
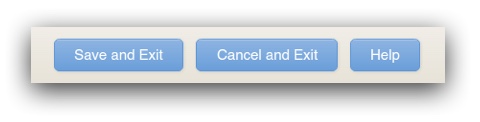
Once you're done adjusting settings and are satisfied with the results in the preview, you're ready to click Save and Exit on the bottom control bar:
The results - as well as the steps for editing - depend on whether you're using the Dreamweaver Extension or Standalone version:
- Dreamweaver Extension - The wizard will close and you'll be returned to Dreamweaver. Click Insert to actually add the map to your page:
A notification will be displayed...
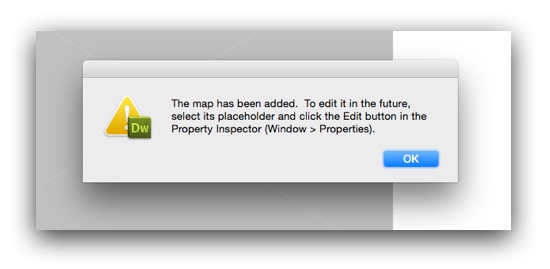
...and the map placeholder will appear wherever you inserted the map:

If you want to view the working map, preview the page in a browser. Use the browser for the most reliable preview (versus using Dreamweaver Live View). If you only see a gray box, an empty space, or an error when previewing, make sure that Edit > Preferences... > Preview in Browser > Preview Using Temporary File is disabled.
To make edits, select the placeholder by clicking on it, then use the Edit with Wizard button in the Properties panel (Window > Properties):

You can also use the inspector panel to quickly remove the map or change its dimensions.
To add another map to your page, simply repeat the insertion process as before, using Insert > DWUser > EasyMapBuilder. - Standalone version - The wizard will close and you'll receive a confirmation that the map code has been added to your page. The code will be added at the top of your page, just after the opening <body> tag. You'll need to use an HTML or text editor to move this code into the desired position within your page. The code starts with <!-- Begin DWUser_EasyMapBuilder --> and ends with <!-- End DWUser_EasyMapBuilder -->
If you want to view the working map, preview the page in a browser.
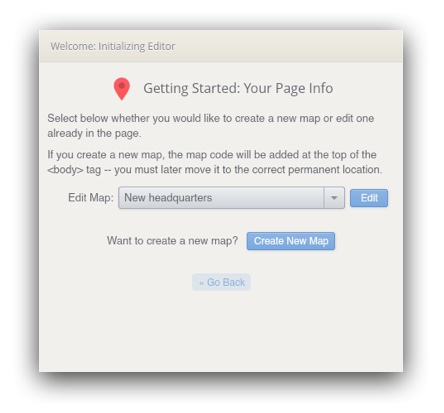
To make edits or add a map to another page, re-open the EasyMapBuilder program as before. When you're prompted to specify the HTML page and Site Root Folder you're working with, the fields will be auto-filled with the last-used values. Proceed with those same values to edit the existing map. You'll have the option to either edit an existing map, or create a new one in the page:
Have Questions?
If you have any questions about using EasyMapBuilder, please let us know by opening a support ticket below.
Interactive Support Options
Can't find an answer in the on-demand options? Try interacting with other users on the forums or contacting support: