The Z-index Property: How to Control Stacking in Your Webpages
by Nathan Rohler
Z-index Theory

OK, stop drooling over the cookies! Seriously, though, this is what the z-index property in CSS is all about. It's about controlling how various elements in your page (text, photos, menus, etc) are stacked on top of each other.
If you were paying attention in math class, the name z-index probably rings a bell: the z in z-index describes the z-axis on a three-dimensional Cartesian coordinate graph (x, y, z). For visualization purposes, pretend that your monitor exists in three dimensions. On a web page, the virtual z-axis extends out of your monitor towards you. As the z-axis extends towards you, the z-index becomes more positive. Thus, applying a greater z-index value to an HTML element relative to another HTML element places the first object in front of the second (closer to you) if they overlap. If you visualize objects on your page as a stack of sheets of paper, objects with the bigger z-indexes lie on the top of the stack.
The CSS z-index property allows you to precisely layer content on your page no matter in what order you declared the objects in the page's HTML code.
If You Want To Use Z-index...
One reason why the z-index can be confusing is that the position property must be declared for each item you want to reposition with z-index. The options for the position property are fixed, absolute, and relative. For most situations, the relative value is the one you'll want. (We'll be covering these position values in more detail in another article.)
Changing the Default Stacking
The z-index is specified when you need to circumvent the default stacking of HTML elements. By default, HTML elements are indexed in order of appearance in the source code of the page (aka DOM tree). So, if you don't change anything, HTML elements defined later in a page's code will appear in front of HTML elements defined earlier when their x,y coordinates overlap.
This is why many times menus end up beneath other graphics. Developers usually write menu HTML first, placing that code at the top of the page; thus, the menu is at the top of the DOM tree but at the bottom of the visual stack. This can be changed by assigning position: relative and a z-index value to each element:
<div class="menu" style="position: relative; z-index: 2;">

  ...dropdown menu code is here...

  </div>

<img src="logo.png" style="position: relative; z-index: 1;" />
If we hadn't added the extra CSS code via the style attribute, the image would have been on top of the stack (above the menu). Using the z-index CSS property, however, we can assign the menu a higher z-index relative to the image, forcing the menu to display at the top of the stack.
A Real-Life Example
I like using realistic examples, so let's work with a popout menu setup – one of the most common examples where you'll run into z-index troubles. We have a demo with a popout menu on the left that's supposed to be overlaid on top of the content on the right. The only problem is... it's not working:
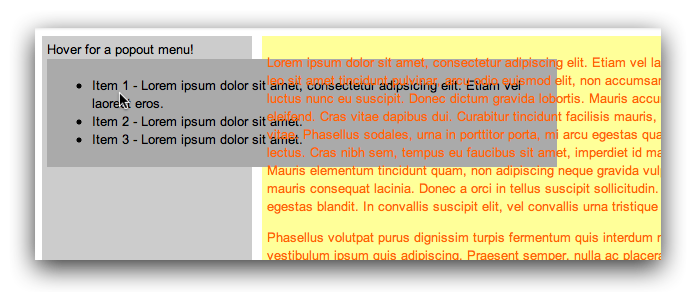
Because our popout code is defined before the content code, the popout menu is displaying behind the main content. You can view and experiment with the full code for this here.
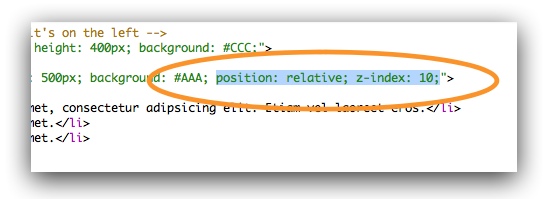
The fix is very simple. We simply apply a z-index declaration to the popout div using a slightly higher value (10 for this example), along with a position: relative; declaration that causes the z-index value to be applied. Here's the code change if you're following along in the source:
And that's all it takes:
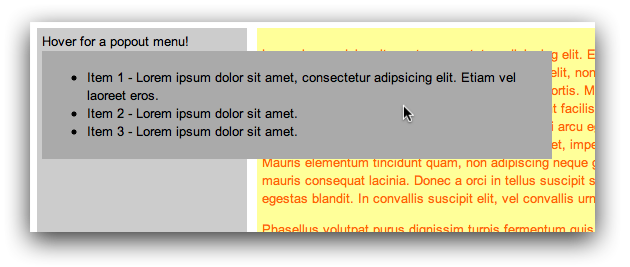
Now our menu really looks and works like a popout menu. You can view and experiement with the finished code here.
An Experimental Art
Especially if you're just starting, layering will be more of an experimental art than a precise science. Instead of ripping your hair out refreshing your browser a bazillion times, use Firebug for Firefox or the Developer Tools in Chrome to play around with the z-index and determine what code changes are needed in your pages. The composition of layers may surprise you. Now you know how to make elements "jump": with z-index and position!
Have questions or enjoyed the article? We'd love to hear from you. Share in the comments below!