 Download Help PDF (29MB) | Search:
![]()
This pod only applies if you're using the ImagesStandard image display element (most slideshows do). In these cases, it allows you to specify the default image transition effect used between each slide / image. To view a description of each effect, you can hover over the effect name. Or, you can view the summary of all effects in the table below. If you don't wish to have the description tooltips, you can temporarily disable the tooltips by selecting File > Enable/Disable All Tooltips on the program menu.
Selecting multiple items (by holding down the CTRL or CMD key) will make the slideshow randomly cycle through those selected transitions. To cycle through all of the transitions randomly, select only the Random option.
If you do not specify an transition, the FadeStandard transition will be used by default.
To configure all of the available settings, see the Editing Transition Configuration Settings section below.
There are a number of image transitions which can be selected from. The following table summarizes them:
| Transition Name | Description |
|---|---|
| FadeStandard | The FadeStandard transition is the standard fade transition used in most slideshows, where the old image fades out and the new image fades in (usually at the same time). This is the default transition. |
| Random | This option, if used, must be the sole selection. Selecting 'Random' means that all of the transitions will be randomly used when the images change. As mentioned above, you can also select several transitions and only these selected transitions will be randomly cycled through. |
| Cube | The Cube transition shows a cube which has the old and new images on adjacent faces. The cube rotates to transition from one image to the other. |
| Flip | The Flip transition is like a playing card with the old image on one face and the new image on the other. The card flips to transition from one image to the other. |
| Pixelate | The Pixelate transition makes the old image become highly pixelated and then become unpixelated. When it becomes unpixelated, the new image is revealed in the old image's place. |
| Slide | The Slide transition slides the old image out and slides the new image in at the same time, giving the appearance of both images being contiguous. |
| BlurFadeFly | The BlurFadeFly transition makes the old image blur, fade, and fly out. Then, the new image blurs, fades, and flies in. |
| SoftWipe | The SoftWipe transition makes the old image wipe away, while the new image wipes in. The wipe effect has a soft edge, giving a softened, polished look. |
| PopInOut | The PopInOut transition makes the old image 'pop' out of its place, then the new image 'pop' back in to replace it. |
| PopIn | The PopIn transition makes the new image 'pop' in on top of the old image, replacing it. |
| PopOut | The PopOut transition makes the old image 'pop' out to reveal the new image below it. |
| BlurFadeInOut | The BlurFadeInOut transition makes the old image blur and fade out, then the new image blurs and fades in to replace it. |
| BlurFadeIn | The BlurFadeIn transition makes the new image blur and fade in on top of the old image, replacing it. |
| BlurFadeOut | The BlurFadeOut transition makes the old image blur and fade out to reveal the new image below it. |
| PixelDissolveInOut | The PixelDissolveInOut transition uses the PixelDissolve effect to hide the old image block-by-block, then uses the same type of effect to reveal the new image. |
| PixelDissolveIn | The PixelDissolveIn transition uses the PixelDissolve effect to reveal the new image on top of the old image, replacing it. |
| PixelDissolveOut | The PixelDissolveOut transition uses the PixelDissolve effect to hide the old image block-by-block, revealing the new image below it. |
| SoftIrisInOut | The SoftIrisInOut transition uses an Iris effect to hide the old image, then uses the same type of effect to reveal the new image. |
| SoftIrisIn | The SoftIrisIn transition uses an Iris effect to reveal the new image on top of the old image, replacing it. |
| SoftIrisOut | The SoftIrisOut transition uses an Iris effect to hide the old image, revealing the new image below it. |
| BlindsInOut | The BlindsInOut transition uses a Blinds effect to hide the old image, then uses the same type of effect to reveal the new image. |
| BlindsIn | The BlindsIn transition uses a Blinds effect to reveal the new image on top of the old image, replacing it. |
| BlindsOut | The BlindsOut transition uses a Blinds effect to hide the old image, revealing the new image below it. |
There are a number of different settings which affect the appearance, duration, etc. of the image transitions(s) used. Some of these parameters are unique to a given effect; others are shared by many or all transitions. To customize these settings, click the 'Edit All Advanced Transition Configuration Settings...' button:

Tip for Advanced Users and Developers: To learn in more detail about all of the available attributes (properties) for each transition, see the com.dwuser.ss4.ui.ImagesStandardTransition class documentation in the API Reference. All of the wizard-based settings shown below are used to set and modify properties on the <ImagesStandardTransition ... /> style selector node in the <styles> section of the XML configuration file.
The Edit Transition Settings dialog will open:
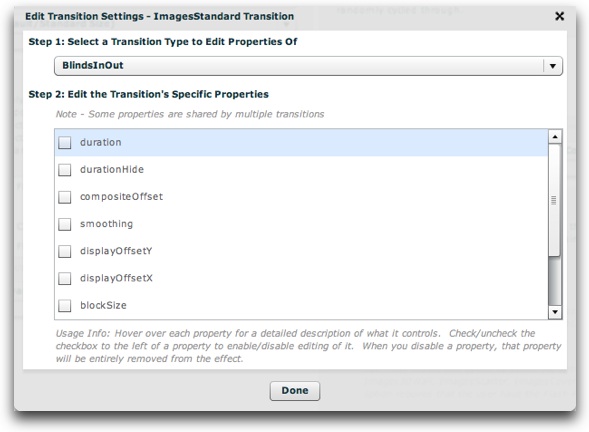
First, you must select the transition for which to edit the properties. You will want to select each of the transitions you plan on using in the slideshow. Once a selection has been made in the 'Step 1' dropdown, you'll see all of the available parameters which can be set for that specific transition. (Advanced Users and Developers: See the above note for detailed documentation on available properties.) While in the wizard, hover over each property's name for a detailed description of what it controls along with the property's default value for that transition:
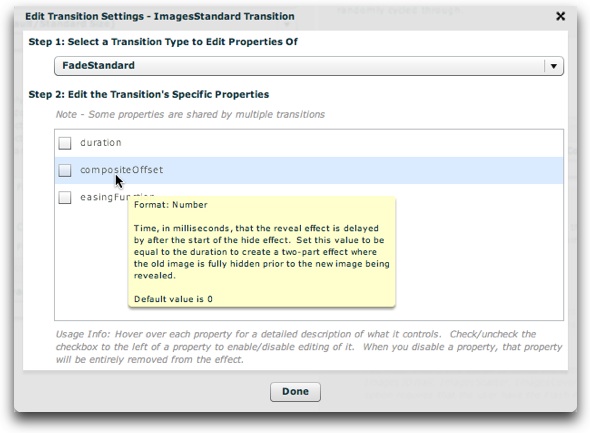
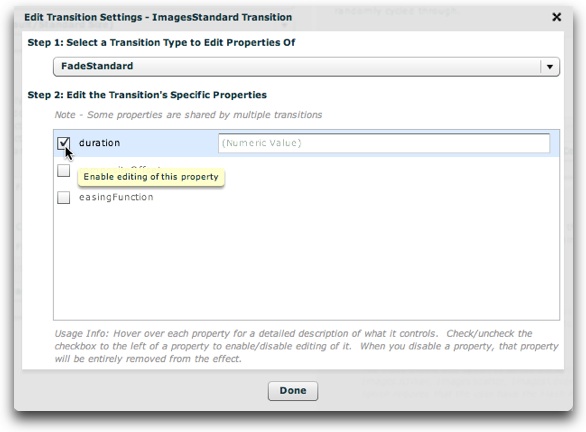
By default, none of the properties are enabled for editing; if you wish to specify a value for a property, check the checkbox to the left of the property name. Disabling the checkbox will remove that property from the transition settings. The more commonly used properties are placed at the top of the list. For example, the duration specifies how long the effect lasts, and is the most important property.
For this example, the duration and easingFunction properties have been configured as follows for the FadeStandard transition:
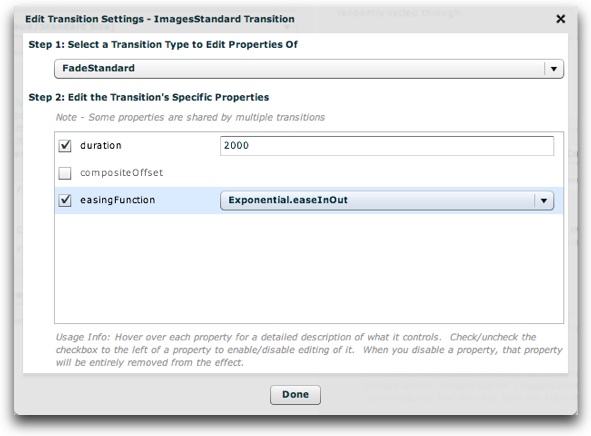
Note: If you're setting a dropdown value but want to use the value which initially appears, it's a good idea to select two values to ensure that the property "sticks". In other words, in the screen above, you might select 'Linear.easeIn', then revert back to 'Linear.easeNone'. Otherwise, the wizard may not be able to know that you really wanted to set the value.
When you're done setting any properties, click the 'Done' button to exit:
By default, most transitions hide the old image and reveal the new image at the same time. If you wish for both to take place separately, use the Composite Offset setting in the Edit Transition Configuration Settings dialog. For example, if you set Duration to 2000, set Composite Offset to 2000 as well. This would make the old image fade out over two seconds, then have the new image immediately fade in over two seconds.