Christmas Special: Add a Snowstorm to Your Webpage
by Nathan Rohler
To help put you in a festive mood, we're featuring a holiday-themed article this week. What could be more appropriate at this time of year than adding a snowstorm to your webpage? If you're using Chrome, Firefox, Safari or IE8+, you can see it in progress right now on this page! Move your mouse around and notice how the flakes jump out of the way. You can turn off the snow at any time with the button on the bottom-left.
In this tutorial, we'll walk through building the snowstorm effect using JavaScript and jQuery. If you don't feel like messing with the math, you can also just download the pre-made version below for your site. But I promise – working through the math will help boost your creativity and JavaScript kung-fu.
A note about browser compatibility: While there are workarounds available to add snow for IE6 and IE7, these workarounds require additional processing horsepower, which most computers running these browsers don't have. Rather than bogging down these systems, we unfortunately "leave them out in the cold" instead (pun intended). For IE8, the snowflakes are squares rather than circles in order to accomodate the lack of CSS3 support without overtaxing the browser.
The Pre-Baked Script
If you need a pre-baked script so you can get back to your holiday baking, we've got you covered. First, download the snowstorm.js ZIP file, unzip it, and place the snowstorm.js file somewhere in your site. Then, add jQuery and a link to snowstorm.js just before the closing </body> tag of your page:
<script type="text/javascript" src="http://ajax.googleapis.com/ajax/libs/jquery/1.8/jquery.min.js"></script>
<script type="text/javascript" src="snowstorm.js"></script>
Update the highlighted value to reflect the actual location of the file in your site. If you're using WordPress, you'll find the closing </body> tag in the footer.php template file.
Note: The first line is unnecessary if you already have jQuery in your page.
If you want to adjust how heavy the snow is, read below for information on editing the configuration parameters.
The Recipe
Now, let's dig in to learn about how the JavaScript actually works. I'll go through it block by block, covering what each block handles as we go. To follow along, I recommend you open our editable jsFiddle demo or open snowstorm.js in a text editor.
Tip: If the phrase "JavaScript and jQuery" registers as "Bah! Humbug!" to your ears, I recommend you review Eloquent JavaScript and jQuery Fundamentals, two excellent and free eBooks linked in this article.
A Wrapper
First, notice that all of the code in the script is wrapped in (function(){ ... })(); This code, called a closure, allows us to neatly keep all variables within their own scope and avoid danger of interactions from other scripts.
Inside the wrapper, we exit if an unsupported Internet Explorer version (older than 8) is being used:
// Only supported in IE8+
if ($.browser.msie && parseInt($.browser.version) < 8) return;
Configuration Parameters
Next up, we have several configuration parameters that specify the behavior of our snowstorm.
// -------------------------------
// --- Configuration variables ---
// -------------------------------

// How many frames per second?  More => smoother but more processor intensive
var fps = 30;

// How often should flakes be added?  Every 10 frames by default.  Greater => fewer flakes
var addNewFlakesEveryNFrames = 10;

// How many flakes should be added each time?  Greater => more flakes, more processor intensive
var newFlakesToAdd = 3;

// Controls the speed; 0.7 provides a nice speed
var speedControl = 0.7;

// -------------------------------
The comment before each parameter explains what is controlled by that setting.
- The
fpssetting controls how often the snow is updated. - The
speedControlsetting allows you to specify how fast each flake of snow should fall. A smaller number means slower; a larger number means faster. (Note that increasing thefpswill also cause the speed to increase.) - The
addNewFlakesEveryNFramesandnewFlakesToAddoptions control how much snow will be coming down. The first specifies how many frame renderings should pass before more snow is added. The second specifies how many flakes should be added each time an addition occurs. Note that heavier snow means more calculations and can bog down slower computers.
The Flake Factory
After defining a couple of utility variables to hold references to snowflakes and count when new flakes should be added, we define the flake creation function. This function creates a snowflake <div>, adds it to the page with fixed positioning, and creates a reference to it in the flakes array so we can easily reference the flakes and update their positions later. I've added some annotations below:
// The snowflake creator function
function createFlake(curX, curY) {   The function is passed the x and y coordinates to use for the flake

    These two settings determine the variation in speed and drift for each flake.  The speed is also tied to the flake size, but we provide for some uniqueness between even identical flakes.
    // How unique should each flake be?  These values specify max unique speed and wiggle/drift
    var maxSpeedOffset = 2;
    var maxWiggleOffset = 10;

    These two settings determine the minimum and maximum size, respectively, for a flake.  The default is 5-15 pixels.
    // How big should the flakes be?
    var minSize = 5;
    var maxSize = 15;

    The amount of horizontal drifting is determined by the size of the flake; these settings determine the lower and upper boundaries.
    // How much drifting/wiggling should be allowed in the downward path?
    var minWiggle = 10;
    var maxWiggle = 40;

    Now, we calculate the size in pixels (and round) and generate a random opacity between 30% and 100%.  The color is set to blue, but any hexadecimal color can be used.
    var sizePercent = Math.random();
    var size = Math.floor(sizePercent * (maxSize - minSize) + minSize);
    var opacity = 0.3 + Math.random() * 0.7;
    Update in revision 2: We now disable opacity for older IE8 and 9 to ensure better performance
    if ($.browser.msie && parseInt($.browser.version) < 10) //disable transparency on old IE to make rendering easier
        opacity = undefined;
    var color = '#9CF';

    Using the limit we set above, we calculate this flake's unique speed offset – we'll use this later to make each flake fall at a unique rate.
    // Create a unique speed offset, so each flake falls at a unique rate
    var speedOffset = Math.floor(Math.random() * maxSpeedOffset);

    Similarly, we calculate the unique amount that this flake will drift back and forth
    // Create a unique wiggle/drift amount based on size (bigger = more wiggle/drift)
    var wiggle = minWiggle + (maxWiggleOffset * Math.random()) + (maxWiggle - minWiggle) * sizePercent;

    Next, we use jQuery to build a <div> with rounded corners.  Note that it has a very high zIndex to ensure that it's on top.  Positioning is fixed, so snow will keep falling even as you scroll.
    var flake = $('<div>').text(' ').css({
        position: 'fixed',
        left: curX,
        top: curY,
        zIndex: 1000000,
        width: size,
        height: size,
        opacity: opacity,
        borderRadius: size / 2,
        '-moz-border-radius': size / 2,
        '-webkit-border-radius': size / 2,
        backgroundColor: color
    }).appendTo('body');

    Finally, we create a reference object to hold this flake's positioning information.
    var flakeObj = {
        size: size,
        sizePercent: sizePercent,
        homeX: curX,
        curX: curX,
        curY: curY,
        flake: flake,
        uniqueSpeedOffset: speedOffset,
        wiggle: wiggle,
        wiggleCounter: Math.floor(100 * Math.random())    The drifting will be applied like a sine wave based on a 0-99 counter.  We start randomly in the middle of the drift cycle.
    };
    flakes.push(flakeObj);

    return flakeObj;
}
Whew! I promise that all of that code isn't as complex as it seems at first. The best way to understand what's really going on is to play with it and change things; so, before we proceed, I recommend you experiment with that jsFiddle demo I mentioned earlier. Try changing some of the configuration parameters then clicking the Run button to view the results.
Sines of the Times
As our snowflakes are drifting down, we want them to sway back and forth sort of like they would in real life. The easiest way to represent this drifting (aka "wiggling" in the script) is with a sine wave. We're going to flip it sideways so each flake's path looks somewhat like this:
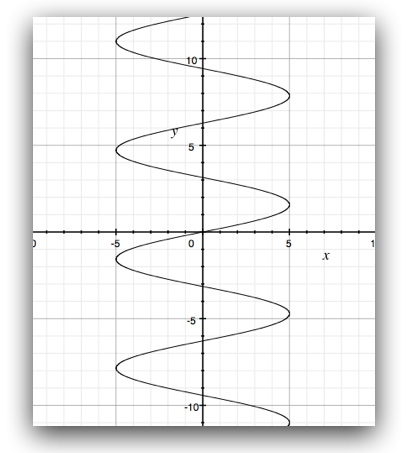
It would be inefficient to calculate the sine values for every flake, so we build a "table" (really an array) with 100 entires that cover one cycle of the wave:
// Create the sin table to save processing power later
var sinTable = [];
for (var i = 0; i < 100; i++) {
    var sin = Math.sin((i / 100) * Math.PI * 2);
    sinTable.push(sin);
}
Our sine calculations use the Math.sin function to get sine values.
You may have noticed in the preceding createFlake section that we created a wiggleCounter variable; that value, which will be incremented up to 100 then reset to 0 again and again, will be used to reference a corresponding value in the sine table. You'll see this in action in a moment.
Not a Creature Was Stirring, Not Even a Mouse
Next up, we have to keep track of the mouse's current position so we can keep flakes from going under the mouse. This prevents the annoyance of a snowflake blocking your intended clicks and also adds some fun, since the mouse's movement affects the flakes' path.
// Track where the mouse is, so we can move flakes away from it
var mouseX = -200;
var mouseY = -200;
var $w = $(window);
$(document).mousemove(function(e) {
    We update the mouse trackers whenever the mouse moves, recording values that are relative to the window (not the document) by subtracting scroll values
    mouseX = e.pageX - $w.scrollLeft();
    mouseY = e.pageY - $w.scrollTop();
});
The Main Updater
Now we're ready for the star of the show – the updater function that's renders each frame. There's a lot of math, but most of it's pretty simple. Let's go through line by line.
function onEnterFrame() {
    // Update existing flakes
    var winH = $w.height();   First, we note the window height so we know when old flakes should be destroyed
    Now we start looping through all of the current flakes to update their positions
    for (var i = flakes.length - 1; i > -1; i--) {
        var flakeObj = flakes[i];
        var flake = flakeObj.flake;
        With some references in place, we calculate the downward speed of this specific flake.  Bigger flakes fall slower due to virtual air resistance.
        var speed = 2 + (1 - flakeObj.sizePercent) * 5 + flakeObj.uniqueSpeedOffset; // bigger = slower to fall
        speed *= speedControl; // apply the speed control     We apply the speedControl variable to adjust the speed.
        With the speed calculated, we determine the new vertical (y) position of the flake.
        var curY = flakeObj.curY;
        var newY = curY + speed;

        To determine the appropriate horizontal (x) position, we increment the wiggleCounter and use it to look up the next value in the sine table.  We then multiply that times the maximum wiggle/drift value.
        var wiggleCounter = flakeObj.wiggleCounter = (++flakeObj.wiggleCounter % 100);
        var sin = sinTable[wiggleCounter];
        var wiggle = flakeObj.wiggle * sin;
        var newX = flakeObj.homeX + wiggle;

        // If we're close to the mouse, force out of the way
        Next, we need to see how close the flake is to the mouse.
        var mouseXDist = Math.abs(mouseX - newX);
        var mouseYDist = Math.abs(mouseY - newY);
        var influenceArea = 150;
        If it's within a 150 pixel box around the mouse, we'll take remediative steps
        if (mouseXDist < influenceArea && mouseYDist < influenceArea) {
            var maxForce = 10;
            ...But first, we want to check the actual *linear* distance using the Pythagorean theorem.
            var dist = Math.sqrt(mouseXDist * mouseXDist + mouseYDist * mouseYDist);
            if (dist < influenceArea) {
                We determine the "influence" the mouse has over the snowflake's position; it's directly related to the mouse's proximity.
                var influence = maxForce * (1 - (dist / influenceArea));
                if (mouseY > newY) {
                    If the mouse is below the flake, we bump the flake back upward and shift its horizontal path to the side
                    newY -= influence;
                    if (mouseX < newX)
                        flakeObj.homeX += influence;
                    else
                        flakeObj.homeX -= influence;
                }
                else
                    If the mouse is above the flake, we force the flake down (away) faster.
                    newY += influence;
            }
        }

        With all of that heavy lifting done, we apply the newly-determined positioning
        flakeObj.curY = newY;
        flakeObj.curX = newX;
        flake.css({
            top: newY,
            left: newX
        });

        If the flake has moved out of view, we destroy it to avoid unnecessary calculations.  We also remove the utility reference in the flakes array.
        // Destroy flake if it has gone out of view by 100
        if (newY > winH + 100) {
            flake.remove();
            flakeObj.flake = null;
            flakes.splice(i, 1);
        }
    }

    Existing flakes are now handled.  But what about adding flakes in the first place?  That's what this next section does.
    // Add any new flakes
    if (++additionCounter % addNewFlakesEveryNFrames == 0) {   We increment the additionCounter variable until it's time to add some flakes.
        additionCounter = 0;

        We determine the the minimum and maximum positioning values based on the window size.  Then, we loop based on the number of needed new flakes.
        var minX = -100;
        var maxX = $w.width() + 100;
        var homeY = -100;
        for (var i = 0; i < newFlakesToAdd; i++) {
            The x (horizontal) position is randomly set between the two extremes; the y (vertical) position is set at the top of the window with a little random variation.
            var curX = minX + Math.floor(Math.random() * (maxX - minX));
            var curY = homeY + Math.floor(100 * Math.random());
            Finally, we call the creator function to actually make the snowflake and record its existence.  On the next frame, we'll put it in motion.
            createFlake(curX, curY);
        }
    }
}
Again, there's a lot to study in this function. This simple summary may help you better grasp what's going on:
- We look at existing snowflakes
- We calculate the new vertical position
- We calculate the new horizontal position
- If the mouse is nearby, we bump the flake vertically immediately and shift its overall horizontal course a tad
- We apply the new positioning values to the snowflake
- If the snowflake has gone out of view, we destroy it
- We look to see if any new snowflakes are needed
- If it's been N frames since the last snowflake creation, we create one or more new snowflakes, randomly distributing them horizontally.
Finally, we start the animation by calling our frame handler regularly with an interval:
// Start the animation based on the requested frames per second
setInterval(onEnterFrame, 1000 / fps);
And that's it! We now have an infinite supply of snowflakes that float down and away in their own unique way (and even avoid the mouse while doing it).
Next Steps
Naturally, a snowstorm can be a little annoying under certain circumstances. That's why it's a polite idea to add a "toggle" button for the snow. For example, add this additional HTML to your page:
<div id="toggleSnow" style="position: fixed; bottom: 0; left: 0; padding: 10px; background: #000; color: #FFF; text-decoration: underline; cursor: pointer;">
   Toggle Snowstorm
</div>
And this JavaScript to snowflake.js below the setInterval call:
$('#toggleSnow').click(function(){
    newFlakesToAdd = (newFlakesToAdd==0) ? 3 : 0;
});
Conclusion
I hope you've had fun fortifying your JavaScript and jQuery skills. While snowstorms are only occasionally applicable on your webpages, the techniques and principles that you've learned transfer to many other types of projects. If you're in a snowy climate, I also hope this tutorial will help give you a renewed sense of the wonder that every single snowflake represents. Remember those days when you were a kid and a simple snowflake could entrance you?
With the snow now gently falling on your website, I hope you can sit back, enjoy a glass of cocoa with friends and family, and have a peaceful, restful and meaningful holiday. Best wishes from all of us here at DWUser.com. See you in the new year!